That act of exploration is one of the most engaging elements of customisation for me. It provides another level of examination and inspection that you don't get sitting them on a shelf. Customising teaches you about surface texture, detail, hidden and obtuse information and its relationship with presented information, construction, texture and material. It can be a method to further enjoy something you already like on a deeper level or a way of building an appreciation of something you initially were indifferent to.
Customisation of toys for me is another form of 'play'. Rarely do I plan too hard nor do I have something in mind when I start, more often than not its a process of action and reaction, ongoing experiments that give me a chance to to discover a figure.
One of those bots that I just bounced off of was the newer leader seeker mould. I picked one up for clearance price but it still just didn't grab me. The plastic quality, the light feel, the surface detail lost in the gloss plastic finish. I didn't spend much and because it had gone almost straight form box to shelf I knew a custom job might give me some value exploring the figure.
I had recently been experimenting with some new techniques and I wanted to share some of that process. Using salt, hairspray and layered paint the technique creates realistic looking paint chipping effects. My only goal was to create something worn, chipped and rusty looking with an interesting colour palette removed from traditional seeker designs.
I started with this.

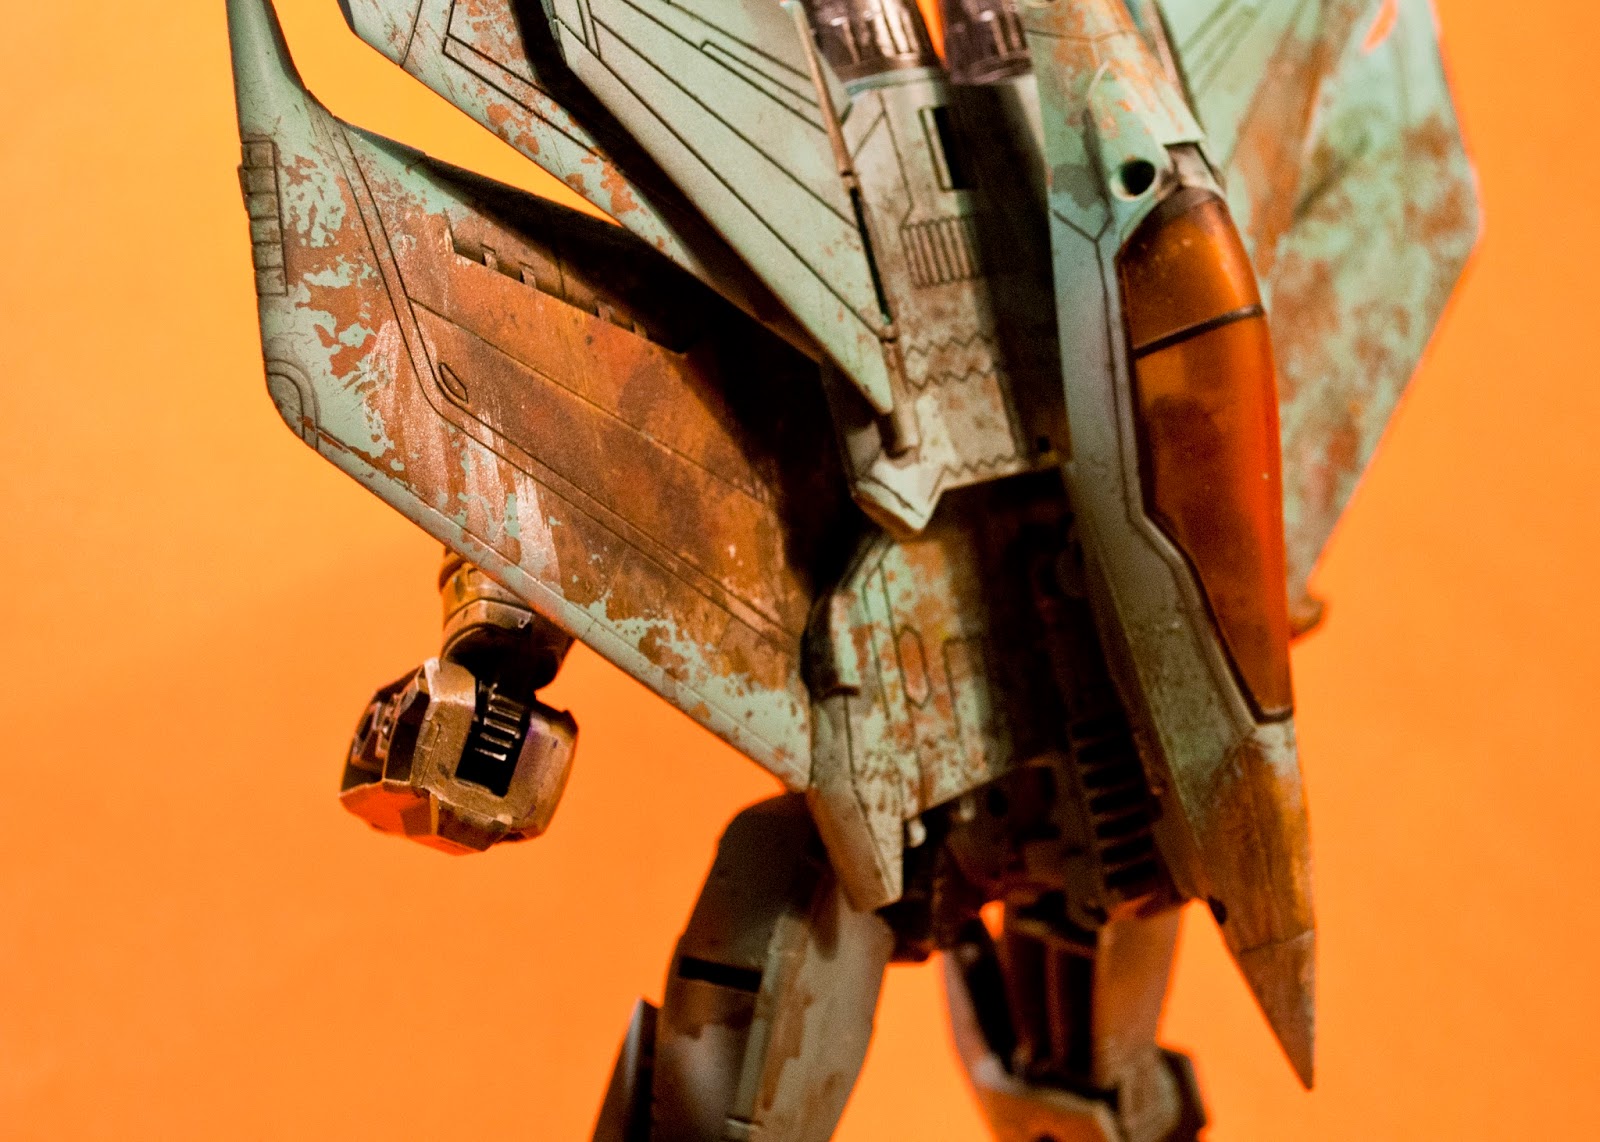
And ended up with this.

Here is how I got there.
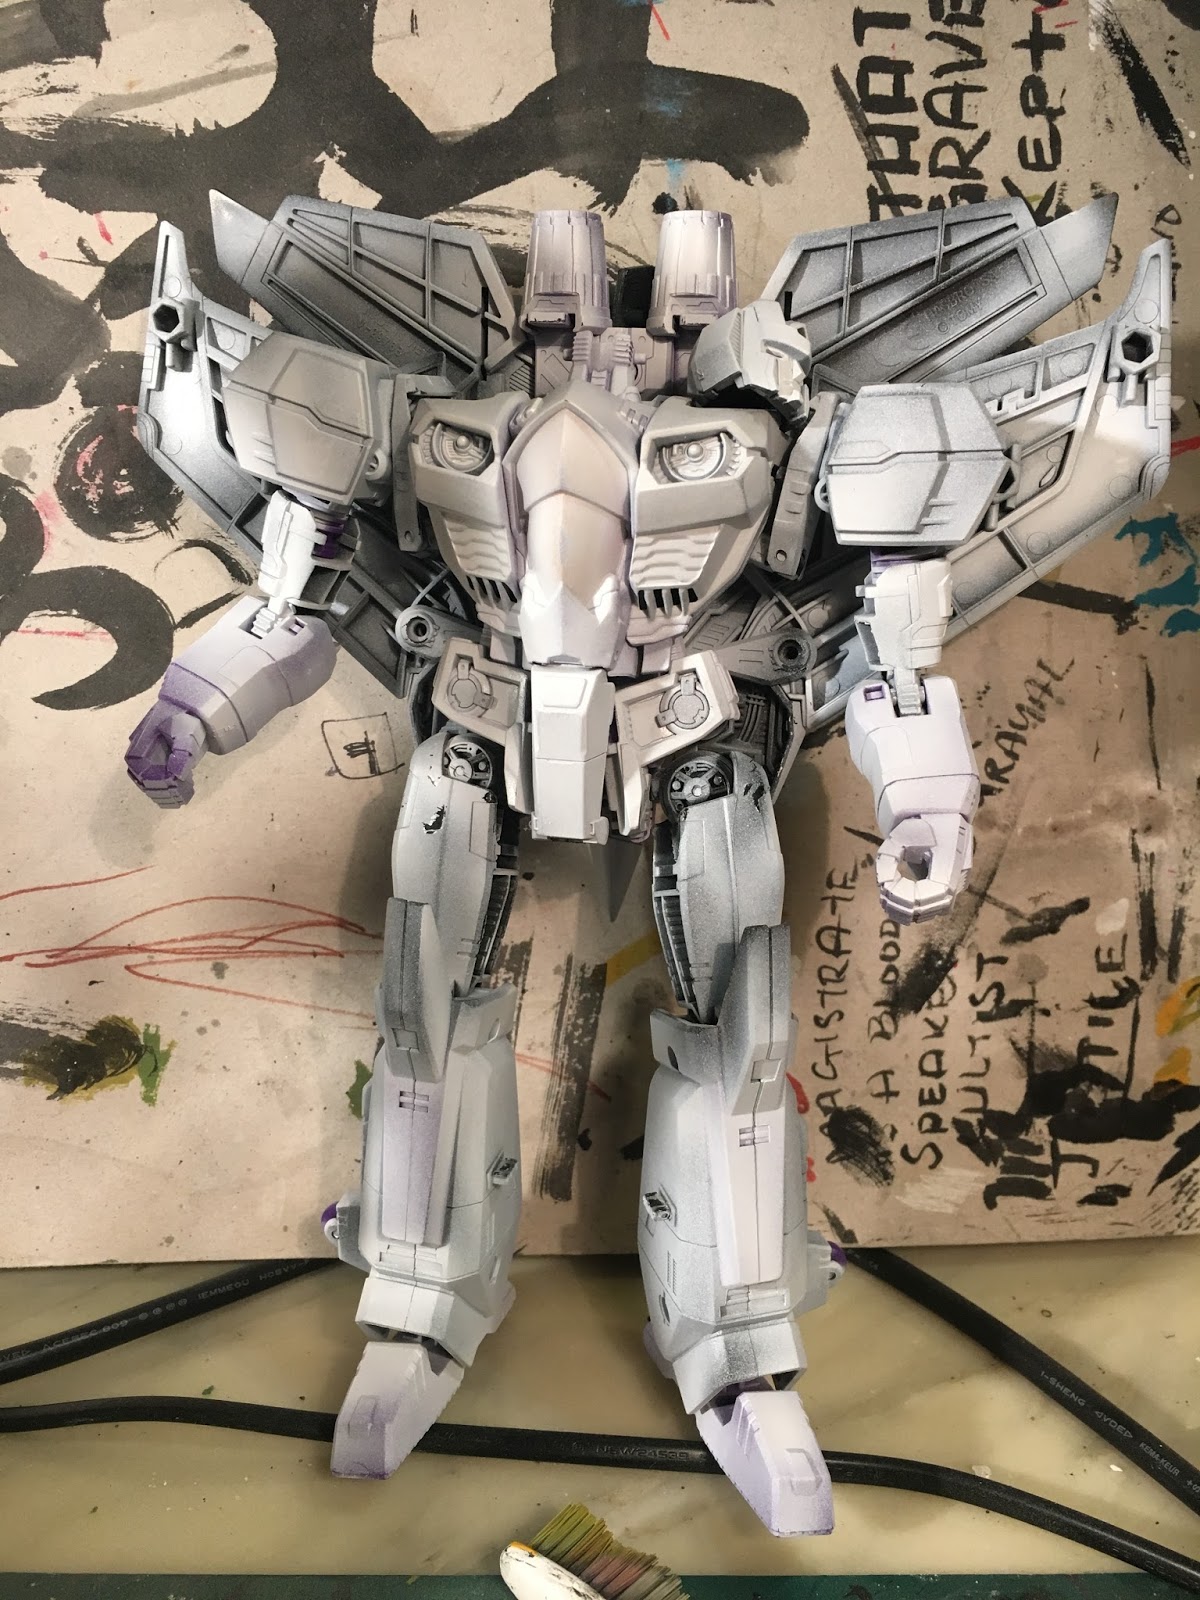
Normally I would consider taking a figure apart to paint separate pieces but in this case I only removed the head and small clear plastic part to paint separately. To ensure the paint would adhere I first gave the figure a quick clean, dry and then a light and quick sand. I then undercoated with a layer of Tamiya white liquid primer applied with an air-brush.
The airbrush gives you a nice even and thin coat, a spray can gives a similar result but depending on temperature and humidity can be a little harder to control. Acrylic auto primers can be purchased for a cheap price and work well. Wanting a rough looking finished product I wasn't concerned with shaving down panel lines or a perfectly even primer coat.

RUST TONES
They key to successful rust effects for this method is the initial paint layer. It is important to consider the underlying colour and texture you intend to appear under your main body colour. I wanted a rich brown rust colour so I started by applying thin and rough layers of a range of acrylic browns with an airbrush.

I find the key to good accuracy is using a source. I took a number of photos of objects that had the surface colour and texture I hoped to capture that I could draw upon.
For the rust coat I employed colours from both Privateer Press's P3 range and Vallejo paints. Both acrylic thinned with a window cleaning solution (alcohol and water). Once dried shadows, some more silver metallic tones and a number of washes were applied to give more depth and a less uniform approach. I found spraying through old pieces of cloth, foam and organic objects helped avoid anything too unnatural looking. It is vital to consider the scale of your mark making, a brush stroke mark will look like a brush stroke immediately ruin the illusion of scale.

HAIRSPRAY AND SALT
The method uses a very simple idea. By applying a texture to the surface that is bonded temporarily you can spray over it, then remove the texture mask revealing the original colour underneath. The method is further assisted as the bonding agent used is hairspray which when brushed with water activates and can be removed leaving behind streaks and residue depending on the pressure applied.
With a very cheap can of hairspray I coat the areas quite liberally that I want to apply my salt texture to. I find coarse rock salt that has been smashed with some pieces ground finely works best as the pieces are no longer uniform, a range of sizes is ideal. Sprinkling them over the wet hair spray surfaces and left to dry they eventually turn white and become bonded to the surface. Depending on the humidity and temperature of your environment employing a hair dryer on a low setting may speed up the process.
In regards to placement, I like to draw back on realistic sources. In some cases chipping, rust and wear and tear is evident in frequently used surfaces such as handles and hinges. For this piece I wanted something that had its major surface areas slowly eroded by rain that might pool on flat areas and the slow spreading erosion caused by a lack of use and exposure to the elements.
The next step involves masking or removing any areas you don't wish painted with your main colour and then painting your primary body colour. With the burnt orange tone I had with my rust I wanted to find a hue that provided enough contrast but also complimented my warm scheme so I mixed up this turquoise tone with a range of different acrylics.
Sprayed on again with an airbrush (this time at a lower pressure as to not remove the salt material) I made a number of thin coats slowly building up layers. In the cases where the brush did remove some salt material its not something for major concern as it actually provides a nice medium between the flat colour and the base layer.

SALT REMOVAL
Once the body colour had time to to dry I started with a stiff bristled brush and old tooth brush to remove the salt exposing the base tone underneath. Due to the effect I I desired I was not bothered if it came out a little rough and I was happy to experiment with the process. An organic pattern was important so I tried to avoid any deliberate marks that looked out of scale.

I found that the effect had not created large enough spots of wear so applying some water and pressure with my brush I pushed away further paint exposing more areas and also focusing on areas where extra wear might be apparent. The hairspray layer while fixed currently can be activated with water, this means that the layer of turquoise paint can be further removed, thinned or chipped just by wetting the brush in the process.
FINAL DETAILING AND PROTECTIVE COAT
I didn't want to overwork or detail this project so I utilised only a small amount of Tamiya panel liner to touch up a few further details including reclaiming some panel lines that had been visually lost in the paint.
To keep with the dry, old and weathered appearance I used a dull-coat on this figure. There are a number of brands but I personally rate the effect of Testors dull-coat. A few light mist coats followed by a heaver layer once dry also gives a level of protection against wear and tear and some of the rigours of transformation. I purposely did not mask the cockpit transparent plastic when I applied the dull-coat to give the appearance of frosted glass from years of dust and micro scratches in the wind.
FINAL THOUGHTS
I did not set out with a great plan other than to experiment with a technique and play with interesting colour palettes. Not locking myself into creating a certain colour that matches a character gives a certain freedom that is rarely felt in a hobby that often gravitates towards prescribed character palletes and appearances.
I think what I enjoyed most was the chance to spend time with a figure I had mostly ignored. I developed a great appreciation for the surface detail and and information that went hidden, obscured by the reflective shiny plastic. Throughout the process I learned just how brilliant the jet mode is, its shapes hide the 'robot under a jet' with some success and just covered in wonderful striking mechanical angles and lines. If I hadn't undertaken this experiment I don't think this toy would have ever come off my shelf.
I am glad it did.
To finish, here are some more images of the finished product.
As always, keep it #refined